
Sensors look simple on a block diagram.
Pick a sensor. Read the output. Convert it into useful data. Ship the product.
Then production starts, and suddenly the same sensor behaves differently from unit to unit. One batch reads high. Another drifts after reflow. A third works fine on the bench but becomes noisy inside the enclosure.
This is where sensor accuracy stops being a datasheet number and becomes a product design problem.
What affects sensor accuracy?
Sensor accuracy in real products is affected by sensor selection, PCB layout, electrical noise, temperature, mechanical placement, enclosure design, calibration, firmware filtering, assembly stress, component tolerances, and production testing.
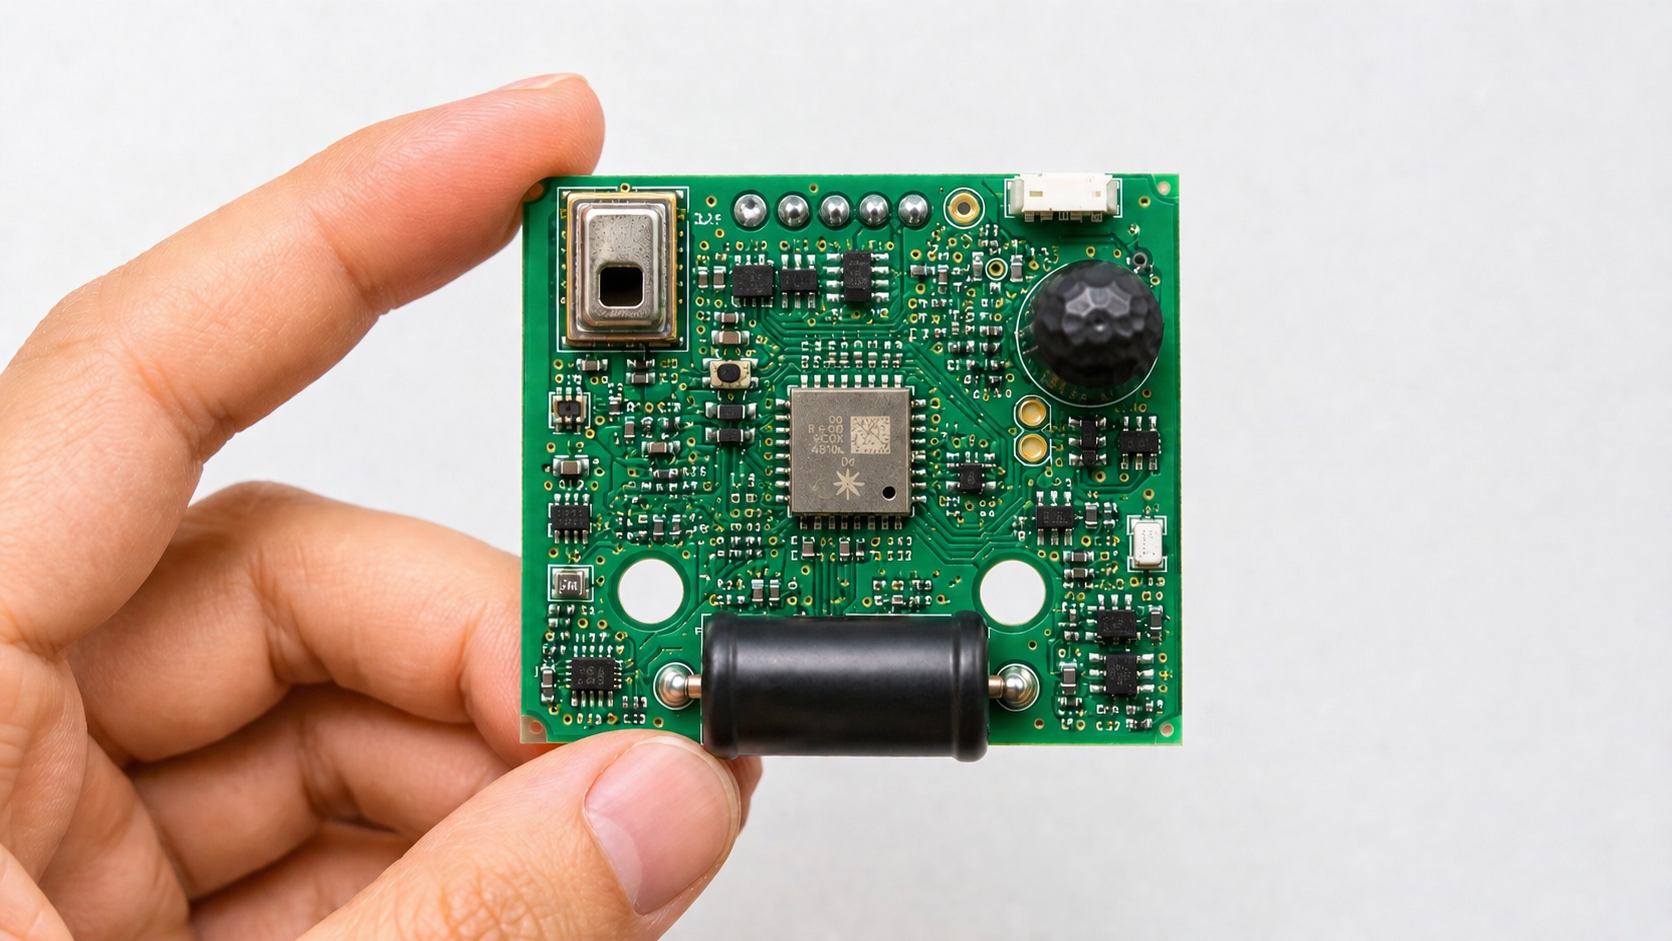
The sensor itself matters, but it is only one part of the measurement system. A good sensor can still give bad readings if the PCB layout is noisy, the enclosure traps heat, the sensor is misaligned, or the factory has no reliable way to calibrate and test it.
A sensor does not work alone. Its accuracy depends on the PCB layout, power design, mechanical mounting, enclosure, firmware, calibration method, assembly process, and test plan. Choosing the right sensor type matters, as covered in Titoma’s guide to essential sensors for product engineers, but sensor choice is only the first round of pain. If the system around it is weak, the best sensor on the BOM will still give mediocre results. Silicon is clever, but it is not magic. Annoying, but useful to remember.
What sensor accuracy really means
Sensor accuracy is how close the sensor reading is to the real value.
That sounds easy enough. It is not.
Most datasheets list accuracy under specific test conditions. Temperature, supply voltage, humidity, mounting method, airflow, calibration state, and mechanical stress may all be controlled. Your product probably does not live in those conditions unless it is very lucky or very boring.
For example, TE Connectivity notes that thermistor accuracy is usually specified at a defined temperature, often 25°C, and that accuracy, interchangeability, stability, drift, and moisture effects all matter when choosing a temperature sensor. That is a polite way of saying “read the whole spec, not just the headline number.” TE Connectivity explains this in its NTC sensor performance guide.
In a real product, sensor accuracy depends on the whole measurement chain:
- the sensor element
- analog front end
- ADC resolution and reference stability
- PCB layout
- power noise
- thermal path
- mechanical stress
- calibration
- firmware filtering
- production variation
- aging and field conditions
Ignore one of these and the product may still work. It just may work differently every Tuesday.
Main factors that affect sensor accuracy in real products
1. Sensor selection
The first accuracy problem is often picking the wrong sensor.
A low-cost sensor may be fine if the product only needs trend data. It may be a bad choice if the product needs absolute measurement, safety decisions, billing, medical interpretation, or tight control loops.
The key is to match the sensor to the real job, not the marketing demo.
Check:
- accuracy over the full operating range
- offset error
- gain error
- noise
- long-term drift
- temperature dependence
- humidity sensitivity
- supply voltage sensitivity
- calibration requirements
- package type
- lifecycle status
- second-source options
A sensor with slightly worse accuracy but better availability, easier calibration, and a stable package may be the better production choice. This is especially true when sourcing risk matters. Titoma’s design for manufacturing guide makes the same point for electronics in general: component choices should support stable yield, sourcing, assembly, and testing, not just look good in the schematic.
2. PCB layout and electrical noise
Many sensors measure small signals. Small signals do not enjoy sitting next to switching regulators, motor drivers, RF traces, or high-current paths.
Noise can enter through:
- power rails
- ground bounce
- poor return paths
- long analog traces
- bad shielding
- nearby high-speed signals
- ADC reference noise
- poor decoupling
- shared ground paths with noisy loads
This matters more with analog sensors, bridge sensors, magnetic sensors, thermistors, current sensors, and low-level environmental sensors.
Good PCB layout cannot make a bad sensor great, but bad layout can make a good sensor look drunk.
For production, the layout should allow repeatable measurement across boards, not just one clean prototype. That means proper grounding, short analog paths, stable references, good decoupling, thermal separation where needed, and test points where the factory can actually measure the signal. Titoma’s PCB DFM checklist is useful here because layout choices also affect assembly, inspection, panelization, and test access.
3. Mechanical placement and alignment
Mechanical design can quietly ruin sensor accuracy.
This is common with:
- magnetic sensors
- optical sensors
- pressure sensors
- load cells
- accelerometers
- gyroscopes
- microphones
- gas sensors
- temperature sensors
A magnetic angle sensor may need precise alignment with a magnet. A pressure sensor may need a clean port and stable sealing. A temperature sensor may need good thermal contact with the thing being measured, not the warm PCB nearby. A gas sensor may need airflow, but not dust, condensation, or direct exposure to contaminants.
Texas Instruments shows this clearly in its AMR angle sensor calibration material. Mechanical offset can create non-linearity in the sensor response, and TI lists offset, amplitude mismatch, orthogonality error, and noise as device-level error sources to consider. TI’s guide to AMR angle sensor calibration is a useful reference if your product depends on magnetic sensing.
The practical lesson is simple: if the sensor depends on geometry, the enclosure and assembly process are part of the measurement system.
So check:
- sensor-to-target distance
- sensor angle
- magnet or target alignment
- adhesive thickness
- screw torque
- enclosure flex
- gasket compression
- port blockage
- airflow path
- vibration exposure
- operator assembly variation
A sensor mounted “close enough” may pass prototype testing and fail at scale because production has variation. Production always has variation. It is basically its hobby.
4. Temperature effects
Temperature affects almost everything.
It changes sensor output, resistor values, amplifier offset, ADC references, battery voltage, mechanical dimensions, adhesive behavior, and sometimes the measured environment itself.
Temperature sensors are the obvious example, but the problem is broader. Current sensors, pressure sensors, gas sensors, inertial sensors, magnetic sensors, and optical sensors can all shift with temperature.
Common temperature-related accuracy problems include:
- offset drift
- gain drift
- self-heating
- nearby hot components
- poor thermal coupling
- enclosure heat buildup
- slow thermal response
- calibration only done at room temperature
A product calibrated at 25°C may not behave the same at 0°C or 50°C. The datasheet usually tells you this. The prototype may not, because prototypes are often tested in comfortable rooms by comfortable engineers.
For products that need tighter accuracy, test across the expected temperature range. Also check real thermal conditions inside the enclosure. A sensor placed near an MCU, charger IC, power resistor, or radio module may measure the product’s heat problem instead of the outside world.
5. Reflow, assembly stress, and handling
Sensors can change after assembly.
This gets missed because teams often validate the sensor on an evaluation board, then assume the same performance will appear after SMT assembly, enclosure integration, and production handling.
That assumption is convenient. Convenience is not a test method.
Reflow heat, mechanical stress, board bending, conformal coating, flux residue, ultrasonic cleaning, adhesive curing, and enclosure pressure can all affect sensor output.
Infineon’s application note for its PAS CO2 sensor discusses offset compensation after assembly and notes that compensation may be needed at the customer assembly line. That is the kind of sentence product teams should read before, not after, a pilot build. Infineon’s PAS CO2 compensation guide is a useful example of why assembly and calibration cannot be separated.
Check early whether the sensor has restrictions around:
- reflow profile
- wash process
- conformal coating
- underfill
- potting
- adhesive exposure
- board flex
- storage humidity
- handling contamination
- required burn-in or stabilization time
Some sensors should not be cleaned. Some should not be coated. Some need a membrane. Some need exposure to air. Some need to be isolated from mechanical stress. The factory will not guess this correctly unless the design and work instructions make it clear.
6. Calibration strategy
Calibration is where many sensor products quietly become manufacturing projects.
A sensor may need:
- no calibration
- one-point calibration
- two-point calibration
- multi-point calibration
- temperature compensation
- field calibration
- factory calibration
- automatic baseline correction
- lookup tables
- firmware correction curves
TI’s AMR material mentions calibration methods such as multipoint linearization, lookup tables, and harmonic approximation for correcting non-linear angle behavior. For sensor products that depend on alignment, that calibration discussion from TI is worth reading before building the fixture, not after the fixture disappoints everyone.
That is useful, but it creates production questions:
- What reference equipment is needed?
- How long does calibration take per unit?
- Can the factory automate it?
- Where are calibration values stored?
- How are failed units handled?
- Can calibration be repeated after repair?
- What happens if the sensor is replaced?
- How is calibration verified in final test?
A calibration process that takes 90 seconds may be acceptable for 500 units. It may be painful at 50,000 units. A calibration fixture that works only when one engineer babysits it is not a production process. It is a science fair with invoices.
This is where DFM and design for test matter. Titoma’s article on questions to answer before starting DFM is relevant because sensor accuracy depends heavily on testability, BOM resilience, and production controls, not just circuit design.
7. Firmware filtering and compensation
Firmware can improve sensor readings. It can also hide problems until they become expensive.
Filtering helps reduce noise, but it adds delay. Averaging smooths readings, but it can hide fast events. Temperature compensation can improve accuracy, but only if the compensation model matches the real product. Auto-zero routines can help, but they can also “correct” the wrong baseline if the product starts up in an unusual condition.
Firmware should be designed around the sensor’s real behavior.
Check:
- sampling rate
- ADC resolution
- digital filtering
- startup stabilization time
- outlier rejection
- temperature compensation
- calibration storage
- fault detection
- self-test behavior
- sensor saturation
- recovery after power loss
- aging compensation
Also define what “bad data” looks like. A disconnected sensor, blocked port, saturated signal, contaminated sensing element, or failed calibration should not quietly produce a confident-looking number.
Bad data with two decimal places is still bad data. It just looks more official.
8. Enclosure and environmental exposure
The enclosure can help or harm sensor accuracy.
For environmental sensors, the enclosure often matters as much as the sensor itself.
A humidity sensor inside a sealed plastic box may not measure room humidity quickly. A gas sensor placed behind poor venting may respond slowly or inaccurately. A temperature sensor next to a warm battery may report internal heat, not ambient temperature. A microphone behind the wrong membrane may lose frequency response. A pressure sensor with a blocked or poorly sealed port may become decorative.
The enclosure affects:
- airflow
- dust exposure
- water ingress
- condensation
- thermal response
- acoustic path
- optical path
- gas diffusion
- mechanical stress
- serviceability
This is where electrical and mechanical teams need to work together early. Sensor placement is not just “put it where there is space.” That is how products end up measuring their own enclosure design mistakes.
9. Component tolerances and second sourcing
Sensor accuracy can shift when supporting components change.
This includes:
- pull-up resistors
- bridge excitation resistors
- op amps
- voltage references
- ADCs
- filters
- protection components
- connectors
- cable assemblies
- membranes
- magnets
- mechanical targets
A second-source resistor may be fine. A second-source magnet may not be. A replacement adhesive may change the sensor height. A new connector supplier may change contact resistance. A “same spec” plastic part may change airflow.
For production, the approved vendor list matters. So does incoming inspection.
Do not approve alternates only by package size and price. For sensor systems, alternates should be checked against the measurement chain. Otherwise, purchasing saves five cents and engineering spends three weeks proving why that was expensive.
10. Production testing
Sensor accuracy needs a test plan.
Not every unit needs full calibration, but every product needs enough production test coverage to catch bad assembly, wrong parts, damaged sensors, blocked ports, poor soldering, and calibration failures.
Good production testing should answer:
- Is the sensor alive?
- Is the reading plausible?
- Is the signal stable?
- Is the noise within limits?
- Is calibration data present?
- Is the sensor installed correctly?
- Is the response time acceptable?
- Does the unit fail clearly when the sensor fails?
The test does not always need to be complex. Sometimes a simple known reference, fixture, airflow check, magnet position, pressure step, or temperature check is enough.
But the test must be realistic. Testing a gas sensor in open air may not prove much if the final enclosure blocks diffusion. Testing a temperature sensor before the product is fully assembled may miss thermal coupling problems. Testing a magnetic sensor without the final magnet stack may prove only that the test fixture works.
This is why pilot builds matter. A pilot run exposes variation that one prototype hides. Titoma’s broader electronics DFM guide is useful here because production readiness is about assembly, testing, sourcing, and repeatability together.
How to improve sensor accuracy before mass production
Improving sensor accuracy is mostly about reducing variation. That means designing the measurement system, assembly process, calibration method, and final test around the real product, not the evaluation board.
Before freezing a sensor-based product, review these items:
- Does the datasheet accuracy apply to your operating conditions?
- Has the sensor been tested inside the real enclosure?
- Has the design been tested across temperature and humidity?
- Does PCB layout protect the sensor signal from noise?
- Does assembly create stress, contamination, or alignment error?
- Does the product need calibration?
- Can calibration be done quickly and repeatably in production?
- Are calibration values stored and traceable?
- Are second-source parts qualified for measurement performance?
- Does final test catch sensor installation and accuracy problems?
- Does firmware detect bad or implausible readings?
- Does the sensor remain accurate after aging, vibration, cleaning, or exposure?
This list is not glamorous. Good. Glamour is usually where hardware budgets go to die.
Final thoughts
Sensor accuracy is not just a sensor specification.
It is the result of electrical design, mechanical design, firmware, calibration, sourcing, assembly, and testing working together. A good sensor can still fail in a bad product design. A modest sensor can perform well if the system around it is designed honestly.
For real products, the goal is not perfect accuracy on one prototype. The goal is repeatable accuracy across many units, built by normal operators, using real suppliers, inside real enclosures, under real conditions.
That is less elegant than a datasheet table.
It is also what customers actually experience.